Optimising Website Graphics
The website loading time is an important factor to get people visit the website. It is even more important when it comes to search engine rankings. Both search engine and website visitors tend to care more about speed of the website they visit. Some research show that 75% of users would not return to the website if it does not load within 4 seconds; and they will leave the website if it does not load within 3 seconds on smartphone devices. 44% of people would tell their friends if they had a poor experience with the website. This means that the website owners do not only lose direct visitors on their sites but also lose potential visitors. Unfortunately, so many website developers even don’t realize about this situation.
Why is optimising web images important?
One of the components of a website should be optimised is its images. The images have always been the heaviest element of a website and they account for about 80-90% in the components of a website. Leaving these images uncompressed and in the wrong format can drastically slow down the loading time of your web page. Therefore, optimising images is important in order to create a balance between the quality and the loading time of the website.
How to optimise images?
First and foremost, you should save your images in the proper dimensions. If you have been using HTML or CSS to resize your images you should stop doing it. Imagine if you have hundreds of images in a photo gallery with bigger dimensions than they should be, it will cause your website unnecessarily much heavier. Saving the images in the desired size helps to reduce the files’ size and loading time of the website.
Secondly, you should use proper file formats for the images. There are three image formats you can safely use on the web and all can be compressed. They are JPEG(.jpg, .jpeg), GIF(.gif) and PNG(.png). Each image format uses a different method of compression and it’s important to choose the right one. For example, if you have icons, bullets or any simple graphics that don’t have too many colours, you can use a file format such as GIF or PNG-8 and save the file with lower amounts of colours. Otherwise, if you have more detailed and complicated graphics, then use JPEG file format to save your images and reduce to a proper quality. For images need to have a transparency background, you re probably going to save to a PNG format.
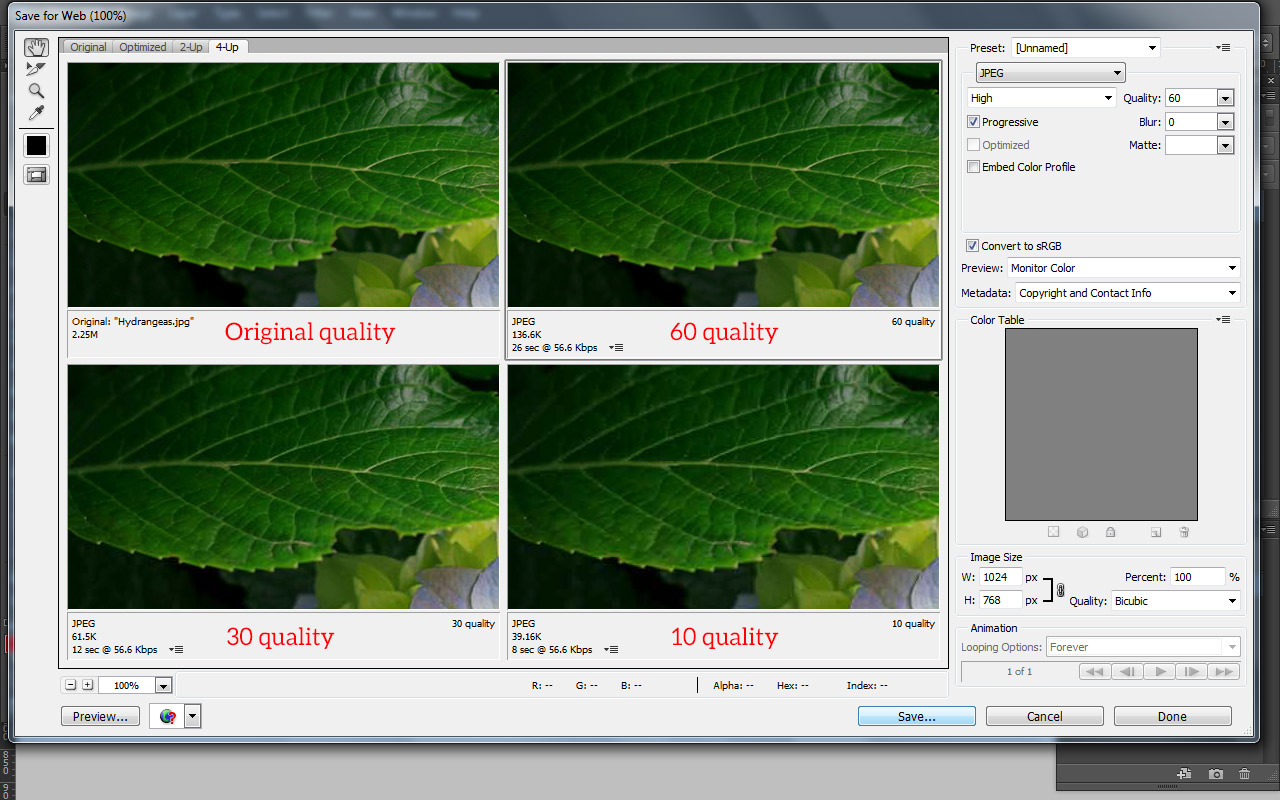
Using Photoshop to optimise images
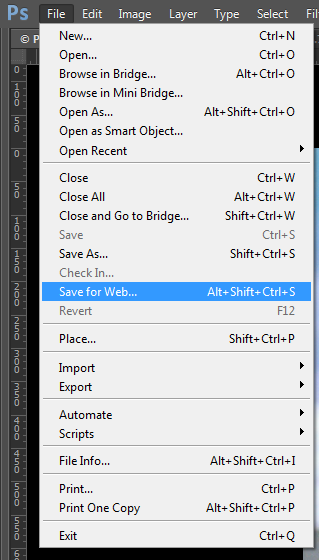
1. Choose File > Save for web…
2. Depend on type of graphic you can choose save to GIF, JPEG or PNG.
- For JPEG you can also check the option Progressive. It depends on how you want the images look like when they’re loading. With Progressive option checked, the images first appear blurry and become clearer when they are completely loaded. Non-progressive make images load line-by-line.
- If the image contains transparent background, make sure you choose PNG and Transparency is checked.
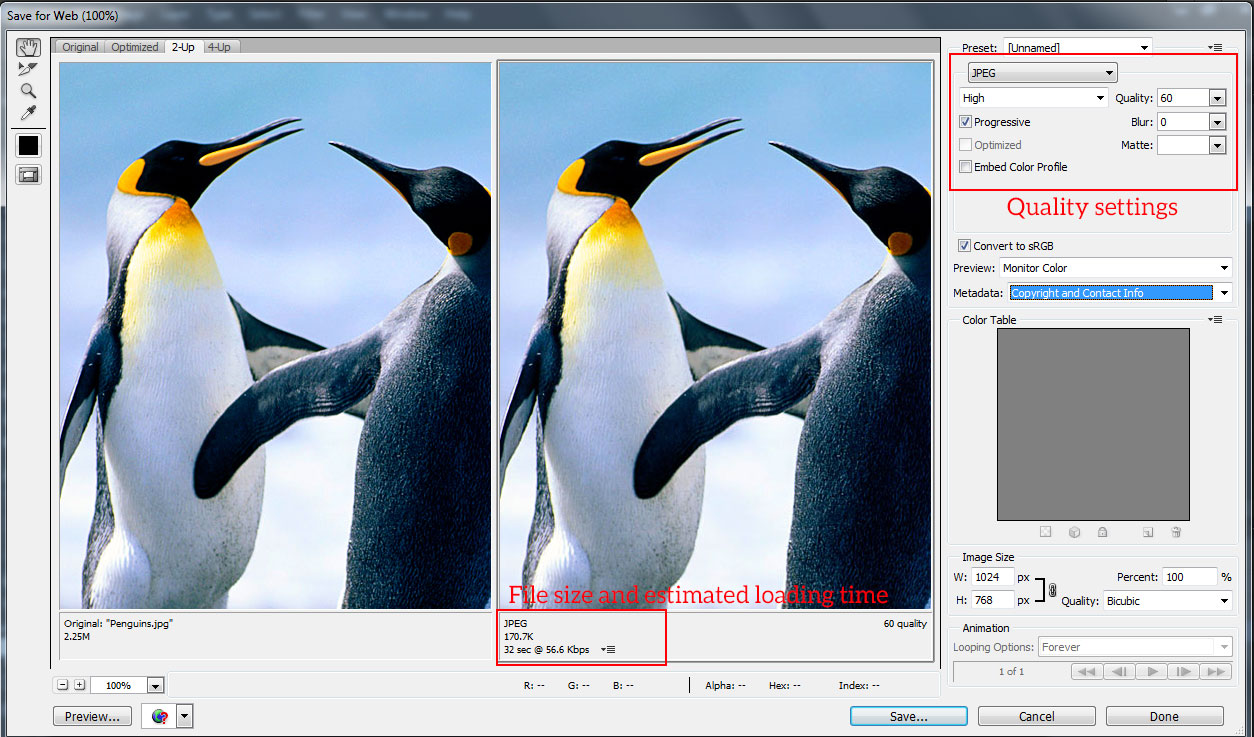
3. Adjust the quality by saving images with lower quality for JPEG format or reducing the amounts of colours for GIF and PNG formats.
4. Alway keep and eye on the file size and estimated loading time displayed in the lower left corner while adjusting settings. At the same time, look at the image quality to make sure it is not over-optimised.
5. Once you have found the perfect balance between quality and compression, click the button Save.
Examples
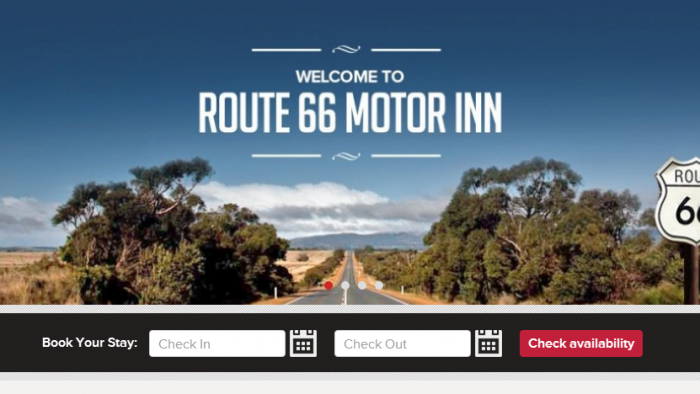
JPEG format for photos
PNG format for transparent image